How to use Live Text API in your iOS app
Quick start guide showing the newly available API in iOS 16.
Published: June 10, 2022 Sponsored See booksWith iOS 16, the Live Text feature is available for developers. However, you won’t find any LiveTextKit or similar framework in Xcode 14. These new APIs are part of the VisionKit framework.
Conversely, Live Text is more like a marketing term. The classes we will be using are ImageAnalyzer and ImageAnalysisInteraction.
The basic setup is not complicated. We need UIImageView to display the new overlay and UIImage instance with some image containing either text or machine-readable code like a QR code.
Setup
The basic setup involves creating ImageAnalyzer and the interaction like this:
private lazy var interaction: ImageAnalysisInteraction = {
    let interaction = ImageAnalysisInteraction()
    interaction.preferredInteractionTypes = .automatic
    return interaction
}()

private let imageAnalyzer = ImageAnalyzer()
In the WWDC22 video, Apple recommends reusing these objects instead of creating new ones. This of course, depends on your use case. You need multiple interactions if you want to show multiple imageViews with the interaction on screen.
In the viewDidLoad we will setup the interaction:
override func viewDidLoad() {
    super.viewDidLoad()

    imageView.addInteraction(interaction)
}
It may also be a good idea to check if Live Text is supported. It requires at least a device with an A12 Bionic chip. This means iPhone XS/XR, iPad Air (3rd gen), iPad (8th gen), and up.
Use the static property isSupported on ImageAnalyzer to hide these features on unsupported devices.
Showing Live Text interface
Once you have a suitable image, you can run the Live Text.
private func showLiveText() {
    guard let image = imageView.image else {
        return
    }

    Task {
        let configuration = ImageAnalyzer.Configuration([.text])

        do {
            let analysis = try await imageAnalyzer.analyze(image, configuration: configuration)

            DispatchQueue.main.async {
                self.interaction.analysis = nil
                self.interaction.preferredInteractionTypes = []

                self.interaction.analysis = analysis
                self.interaction.preferredInteractionTypes = .automatic
            }

        } catch {
            print(error.localizedDescription)
        }
    }
}
Per the video recommendation, I am resetting the analysis and preferredInteractionTypes.
Because the new API is async-only, I am using Task to wrap the rest of the method.
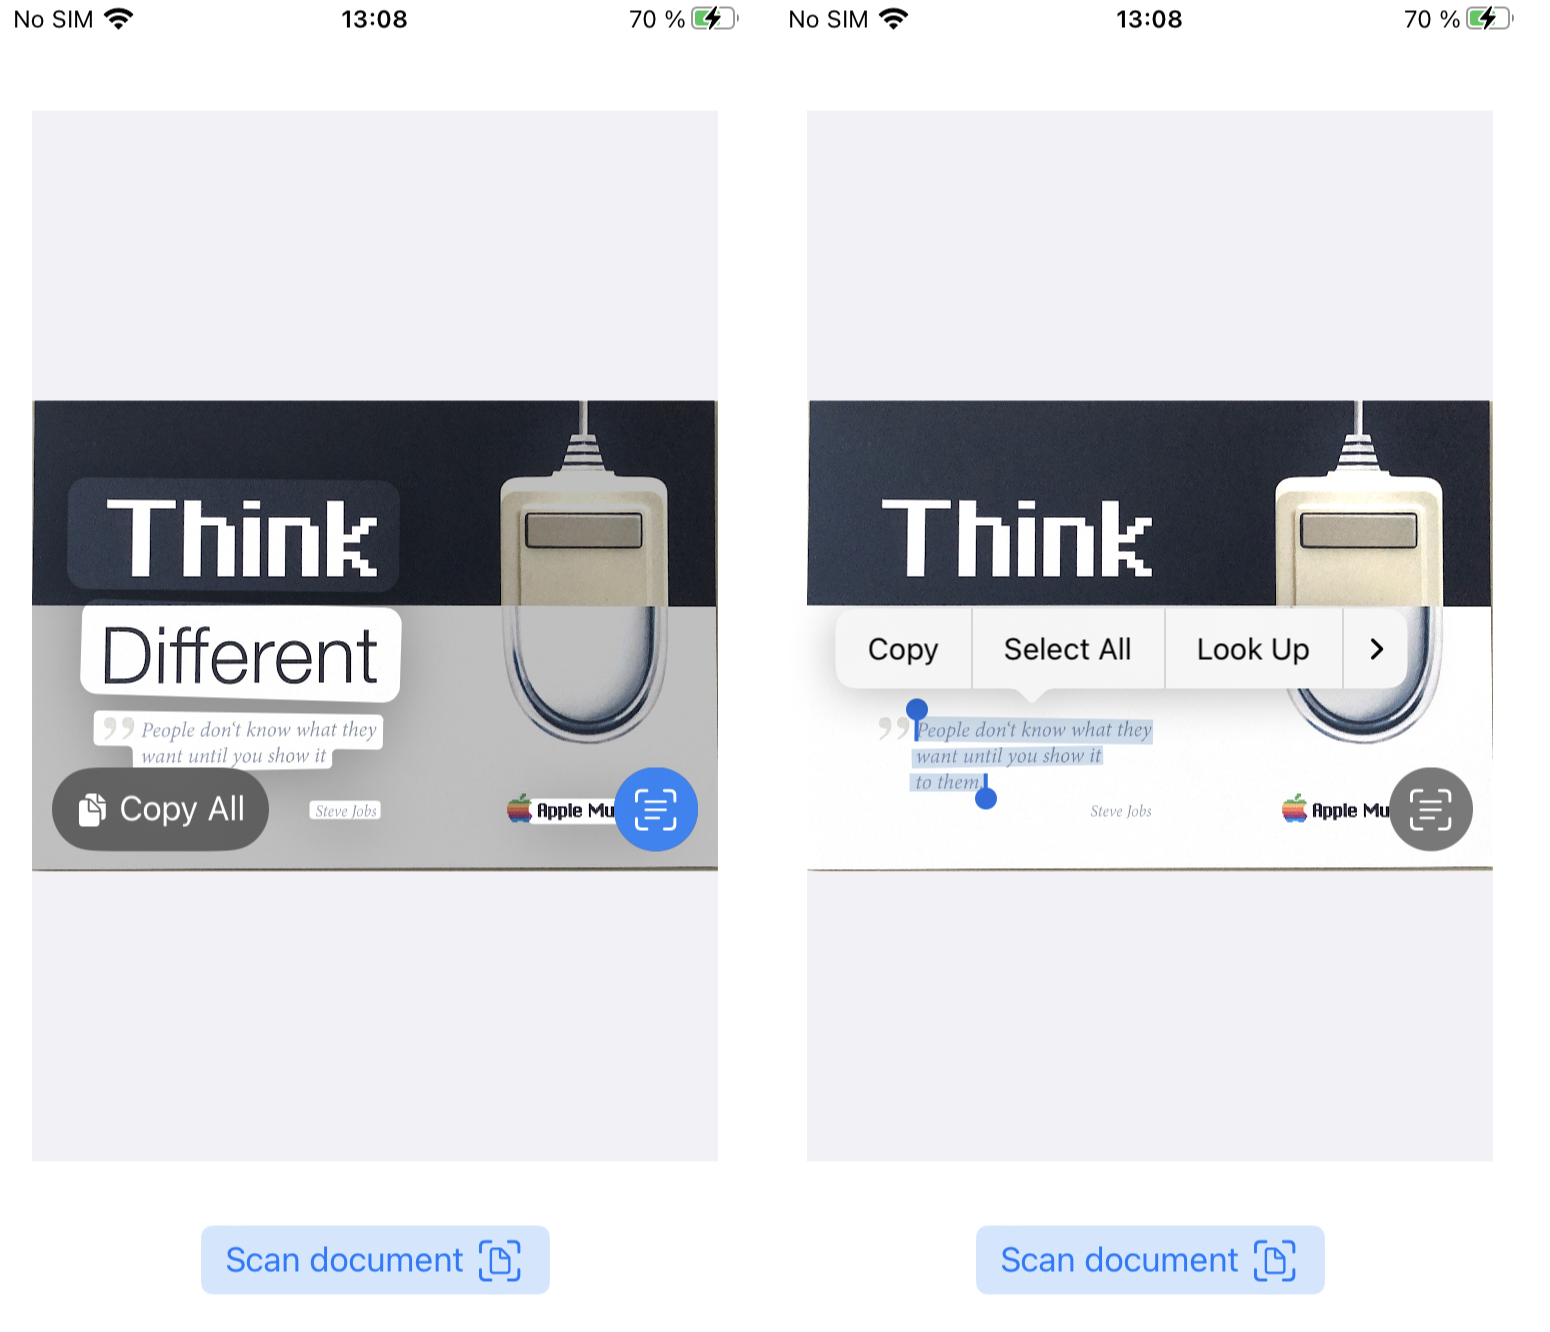
Once the above code runs, you should see the Live Text button in the bottom right corner of your imageView. Tap on it to show the interface.
Additional resources
For more about Live Text, read the official docs (it also has macOS instructions) and watch the WWDC22 session “Add Live Text interaction to your app” it shows further customization and also some tips & tricks.
If you want to try this yourself, I recommend looking at the VNDocumentCameraViewController, which will let you quickly scan documents with the camera to get suitable images for Live Text. I have a tutorial about basic usage.
What about SwiftUI?
I haven’t had the time yet to try this with SwiftUI, but it seems like you will need to wrap UIImageView yourself and use a similar workflow as for UIKit. There does not seem to be a “native” way to do it.
Follow on Bluesky to not miss new posts

iOS blogger and developer with interest in Python/Django.