Xcode: How to upload build with different Bundle ID to TestFlight
When you need to really separate development backend from production one.
Published: June 20, 2022 Sponsored See booksThere are cases when you want your app to appear like two or more apps in TestFlight or even in the App Store. Since apps are identified by their Bundle ID, the clean solution is to create a new target for these “flavors”.
What are the use cases? Perhaps you want a dedicated dev version of your app that connects to different backend server and even uses a custom icon. This way, it is impossible to mix these apps on TestFlight and release the dev version by accident to the App Store.
Another use case is when you have an enterprise app that can be customized per customer - you can easily publish multiple versions without managing Git branches.
All this is pretty straightforward - if you know what to do. Which you will after reading this 🙂
Creating a new target
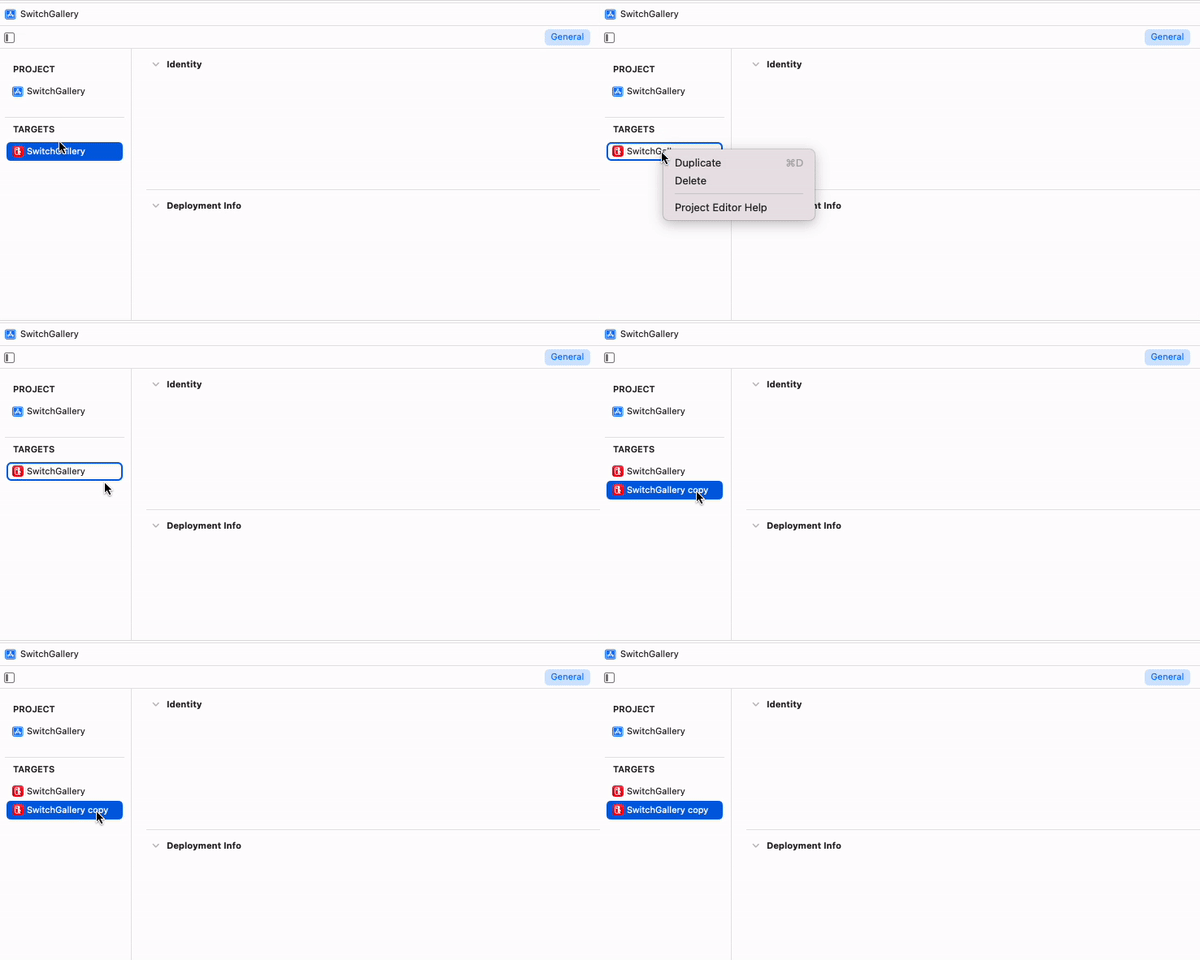
The easiest way to create a new target - and IMO the only one worth doing - is to duplicate the existing one.
Select your project in Xcode and then under “TARGETS”, right-click the one you want to Duplicate and select “Duplicate”.

Configuring the target
Since we created a copy, all values are the same. The only required step for what we need to accomplish is to change the Bundle ID.
You should also probably reset the “Version” and “Build” numbers. You can also change the minimal iOS version, supported platforms, and more.
I would recommend using a different icon, perhaps the existing one but with a badge that says “TEST” or “DEV” or something. To generate these icons, you can use the excellent app Bakery.
Us duplicating the target resulted in a copy of your Info.plist file. Which you probably want to rename to something more descriptive. Once you do, don’t forget to return to project settings, search for plist and rename it here.
Custom parameters for the new target
We want to change how the app with the new target behaves at runtime, which means we need to add parameters. The way to do this is with the new .plist file. Info.plist is not just for Apple-supplied keys. We can add arbitrary key-value pairs, like “base API URL” or similar.
You can have strings, booleans, numbers, or even arrays or dictionaries.
For example adding base URL could look like this:
<key>BASE_URL</key>
<string>https://example.com/api</string>
Uppercase helps it to stand out from the Apple-supplied keys.
Now we just need to access the value, which is done via the Bundle.main. Like this:
if let baseUrl = Bundle.main.infoDictionary?["BASE_URL"] as? String {
     // use the parameter
}
And that covers the basics of having multiple targets for the same apps that share all the code but can have different Bundle IDs and be parametrized.

