How to temporarily cover whole screen of your application
Learn to hide sensitive information when the app is visible in the app switcher or just prepare something cool for the users.
Published: May 10, 2020 Sponsored See booksIn this short tutorial we will go over how to temporarily cover the entire screen of your app with custom UIView. Broadly this has two main use cases:
- Dimming the background to surface pop-over content
- Obscuring content in the App Switcher to hide potentially sensitive info or just show user something fun
Both work the same way, but the code to show and hide those views is different.
Dimming the background
Let’s start with dimming the background. This is nothing else than creating UIView with black background and alpha of something like 0.6.
First create the UIView and use the screen as its size:
let view = UIView(frame: UIScreen.main.bounds)
view.backgroundColor = .black
view.alpha = 0.6
Then we will add it as subview to the main window like this:
UIApplication.shared.keyWindow?.addSubview(view)
Or you can use the UIApplication.shared.windows array and for example use the first one.
Hiding the cover view
To hide the cover view, I usually create variable to temporarily hold the cover view like so:
var coverView: UIView?
Right after creating the view, we would assign it to this variable to have access to it.
let view = UIView(frame: UIScreen.main.bounds)
coverView = view
The “dismissing” the cover view is matter of calling removeFromSuperView:
coverView?.removeFromSuperview()
coverView = nil
Animations for better user experience
For better user experience, consider animating the alpha when showing cover view:
let view = UIView(frame: UIScreen.main.bounds)
view.backgroundColor = .black
view.alpha = 0

UIView.animate(withDuration: 0.2) {
        view.alpha = 0.6
}
And removing like so:
UIView.animate(withDuration: 0.2, animations: {
        self.coverView?.alpha = 0
}) { (_) in
        self.coverView?.removeFromSuperview()
        self.coverView = nil
}
Hiding app content in App Switcher
So far we used the cover view in app to dim the background. We can use similar approach to hide app contents for App Switcher. This is very popular in apps with very personal content, like banking apps, Safari Private mode and similar.
We use the same UIView added to the window, but it is fully opaque and AppDelegate methods handle when to add it and when to remove.
In this instance, it is best to create custom UIView subclass and adding at least a logo so the user is not confused by black screen. You can of course create any layout you want here :-)
In the example below I am going to use CoverView class that I created for one recent project. First declare optional variable in AppDelegate:
var coverView: CoverView?
We will use the method applicationDidEnterBackground which is automatically called whenever our app moves to background. This is perfect time to cover the screen with custom view.
func applicationDidEnterBackground(_ application: UIApplication) {
coverView = CoverView()
coverView!.frame = window!.frame
window?.addSubview(coverView!)
}
For brevity there are some force unwraps but in cases that are almost impossible to happen. I am expecting that the app will have a window and since we are creating the CoverView ourselves, we can be sure it exists :-)
Now what remains to do is to remove the coverView when user returns to the app using the method applicationDidBecomeActive:
func applicationDidBecomeActive(_ application: UIApplication) {
coverView?.removeFromSuperview()
coverView = nil
}
And that is it!
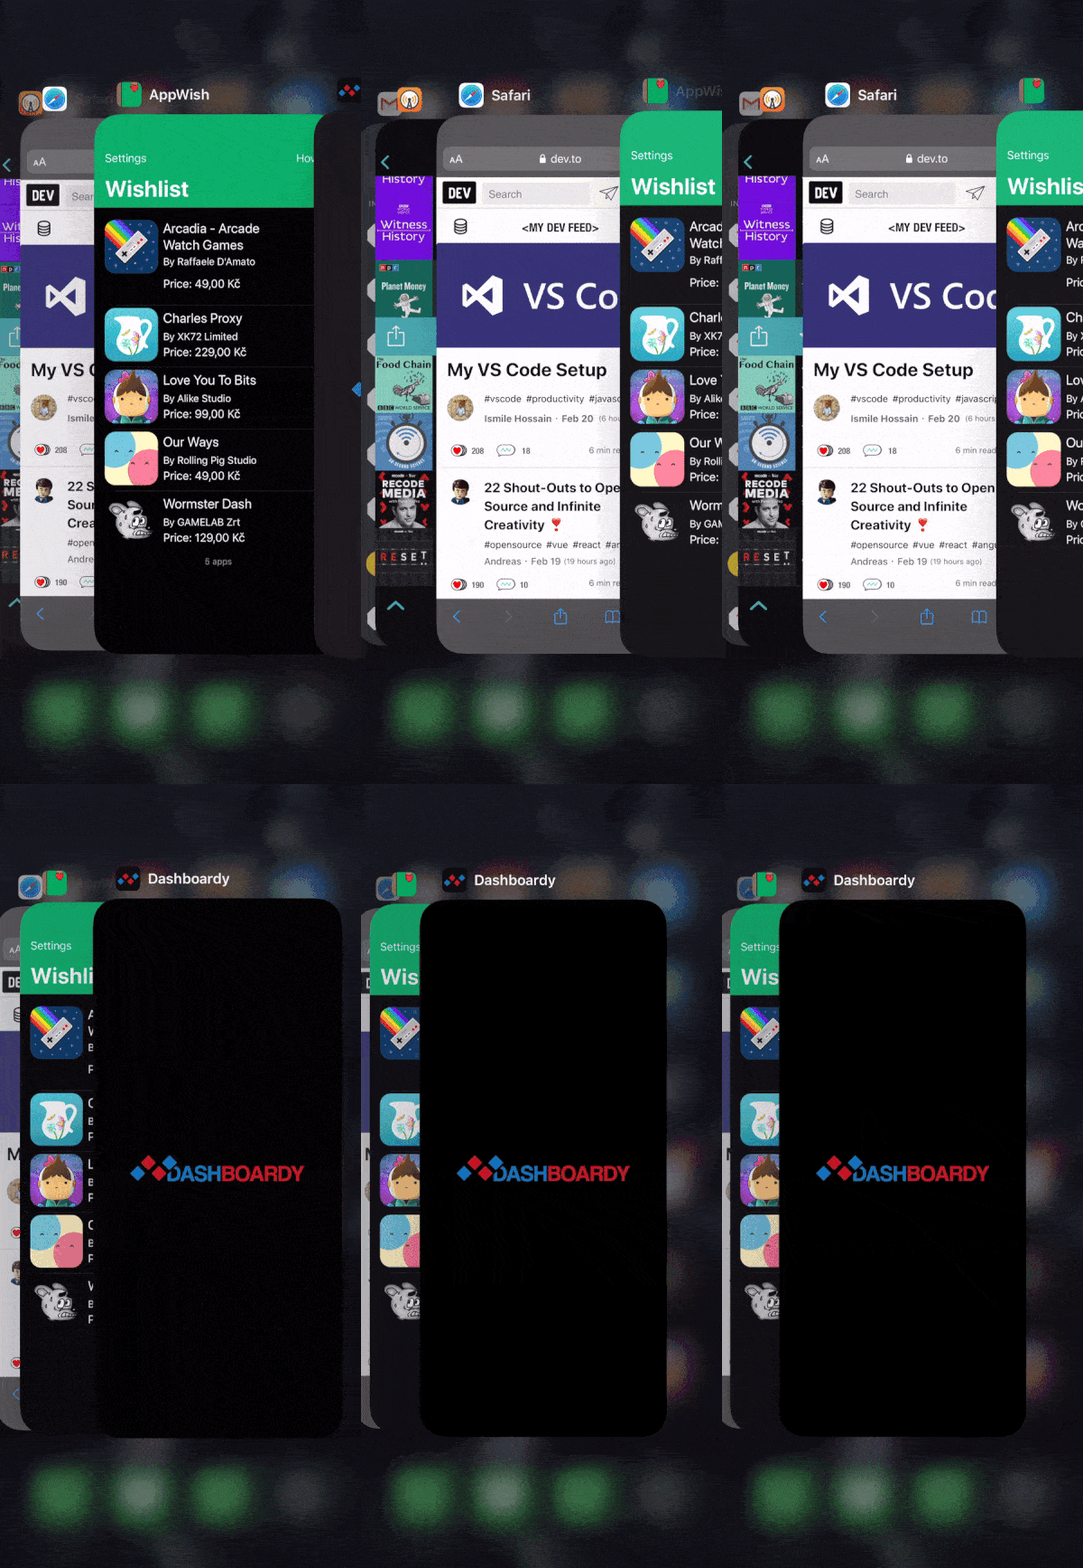
I have recently used CoverView in Dashboardy app which allows users to view their business dashboards on the go and can possibly contain very confidential information.
This is the end result:

Thanks for reading!
Uses: Xcode 12 & Swift 5.3

