Creating basic configurable Siri Shortcut
Simplest possible tutorial to get you started with Siri Intents.
Published: April 12, 2021 Sponsored DetailsI have recently implemented my first Siri Shortcuts and wanted to share my experience mostly because I found the existing tutorials too complicated. In this one, I want to present the minimal implementation, so you can get it running and then build upon that. Because the fewer steps, the fewer issues can happen.
The are couple of flavors, when it comes to implementing Siri Shortcuts. This post deals with the "Intents" variant which offers more freedom and the shortcut is configurable in the Shortcuts app.
I should also add that I am far from expert in this topic.
Shoutout to Drew Westcott for checking out the draft.
Let's get started.
Add the capability
This first step is pretty straightforward. You need to open your project settings, select the "Signing & Capabilities" tab and add the "Siri" capability.
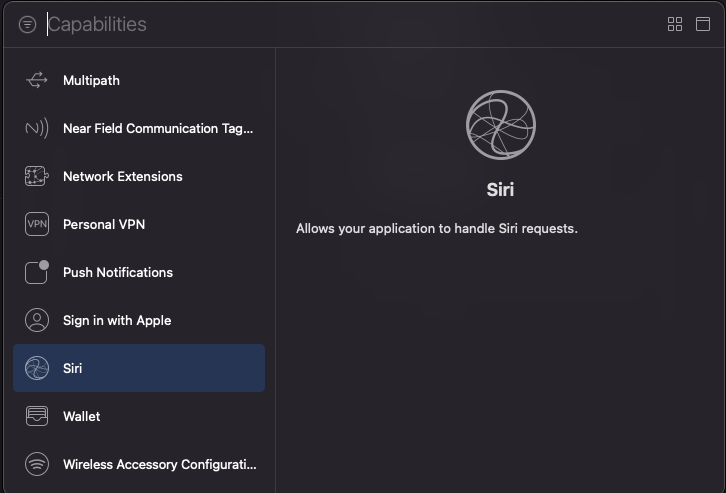
Create Intents file
Next, we will create the Intents.intentdefinition file.
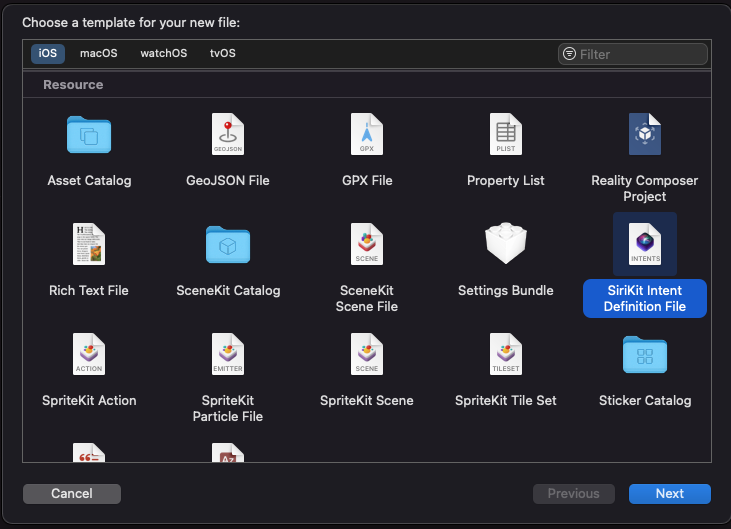
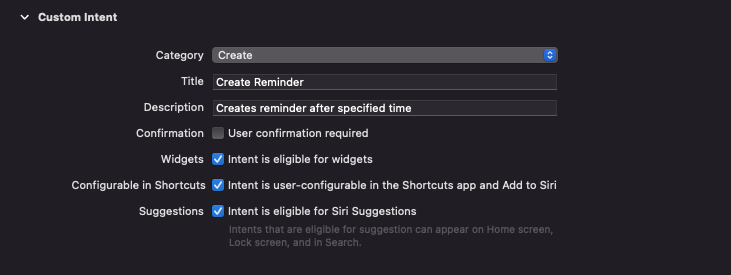
When you open this in Xcode, you will get an UI based editor to create your intents. There are a lot of things to fill in, but they are pretty self-explanatory. At least in my case, because this intent takes just basic parameters.
The first section "Custom Intent" lets you specify the category, title and description along with some checkboxes.
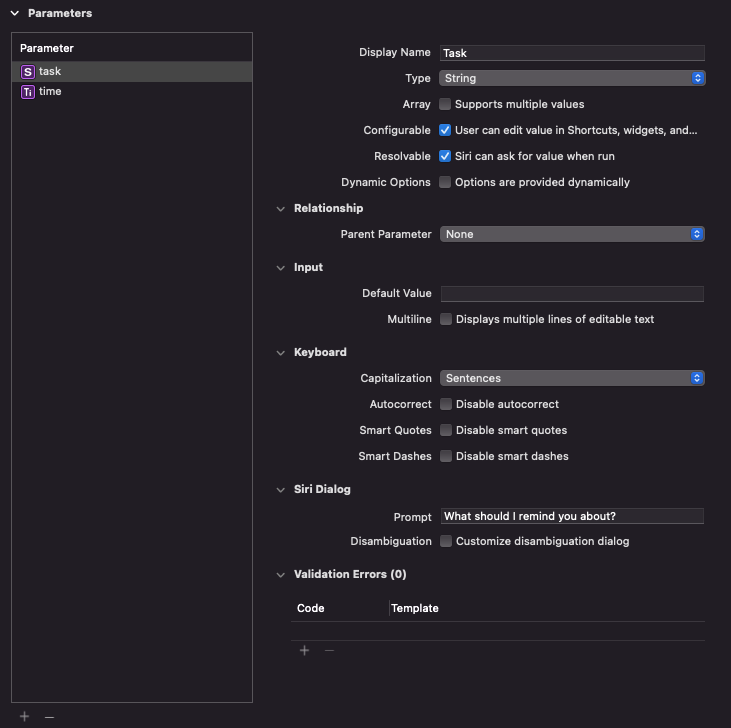
Next is the "Parameters" section. These are the parameters which are configurable in the Shortcut app and can be supplied via Siri.
In my case I created the "task" parameter which is of type "String" and I toggled the "Configurable" and "Resolvable" checkboxes. My second parameter is "time" which is of type "Duration". Here I can also set allowed units, which are minutes and hours in my case.
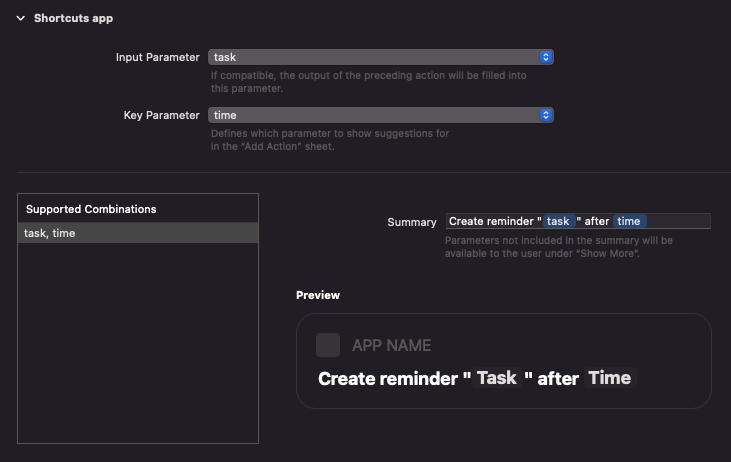
Next there is section "Shortcuts app" where you specify input and key parameters and "Supported Combinations". In my case I always need both, so there is single combination. This has a short summary which is displayed in the Shortcuts app.
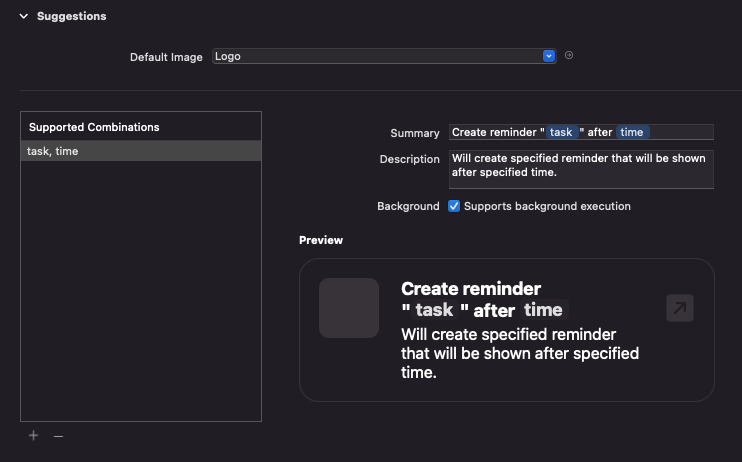
Last section is "Suggestions" which is very similar to the "Shortcuts app" as setting it up goes. Here you can also specify longer description and allow background execution.
Intent response
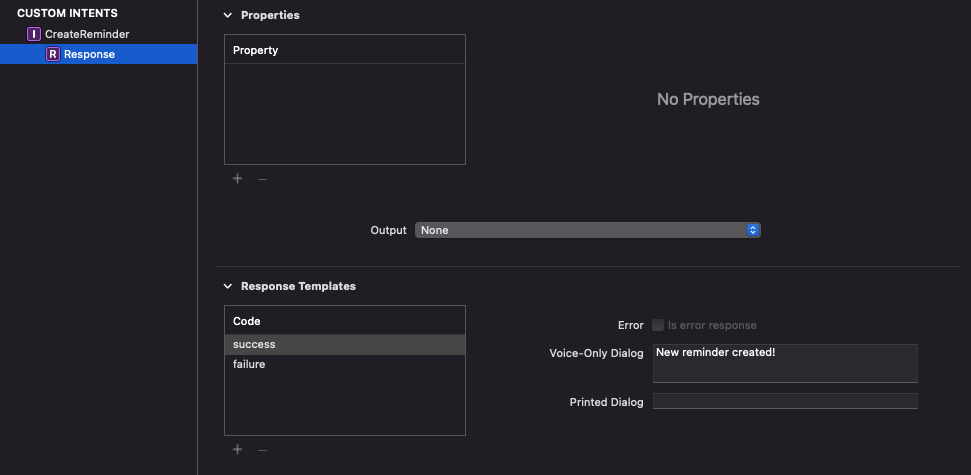
After you finish setting up the intent, select the "Response" in the custom intents list. There are already prepared templates for success and failure. So I just added basic information for the user.
Create Intents Extension
Now it's time for the code. In Xcode use the File menu to add new "Target" and select "Intents Extension".
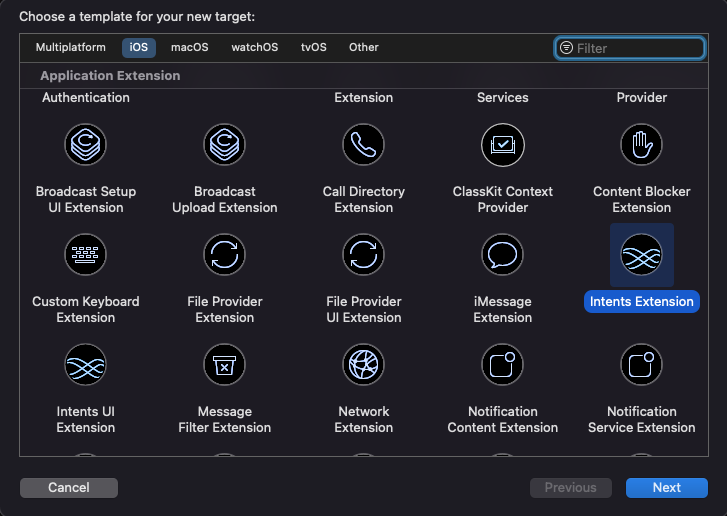
This will create IntentHandler file.
Select your Intents.intentdefinition file and add it also to this extension with the "Target Membership" option.
If you open it, there is just a bit of code.
import Intents

class IntentHandler: INExtension {
    override func handler(for intent: INIntent) -> Any {

    }
}
If you have multiple intents configured, you can check the intent parameter and decide what handler to return.
In my case, I have just a single one. Since my intent is named "CreateReminderIntent", I created the CreateReminderIntentHandler.
This class needs to conform to the CreateReminderIntentHandling, which gets automatically created based on the Intents.intentdefinition file.
Implement custom intent handler
To correctly implement the protocol CreateReminderIntentHandling, we need the method handle along with resolve methods for all the specified parameters in the intents file.
Here is the basic skeleton:
final class CreateReminderIntentHandler: NSObject, CreateReminderIntentHandling {
    func resolveTask(for intent: CreateReminderIntent, with completion: @escaping (INStringResolutionResult) -> Void) {
    }

    func resolveTime(for intent: CreateReminderIntent, with completion: @escaping (INTimeIntervalResolutionResult) -> Void) {
    }

    func handle(intent: CreateReminderIntent, completion: @escaping (CreateReminderIntentResponse) -> Void) {

    }
}
Since I have a task and time parameters, I need to resolve these two. I am not actually sure why this is here. Maybe if I didn't allow Siri to ask for details, I could drop this, but the implementation seems straightforward enough.
The resolving logic depends on your use case. For example my task parameter is resolved like this:
func resolveTask(for intent: CreateReminderIntent, with completion: @escaping (INStringResolutionResult) -> Void) {
    guard let task = intent.task else {
        completion(.confirmationRequired(with: intent.task))
        return
    }

    completion(.success(with: task))
}
If the intent contains value, I return .success, if not, I ask for confirmation.
Let's look at the handle implementation:
func handle(intent: CreateReminderIntent, completion: @escaping (CreateReminderIntentResponse) -> Void) {
    guard let task = intent.task, let duration = intent.time else {
        completion(CreateReminderIntentResponse(code: .failure, userActivity: nil))
        return
    }
    // non-relevant logic omitted

    switch result {
    case .success:
        completion(CreateReminderIntentResponse(code: .success, userActivity: nil))
    default:
        completion(CreateReminderIntentResponse(code: .failure, userActivity: nil))
    }
}
I am basically just checking that I have the needed parameters, and then I use my code from the main app to create the reminder. The result is also my custom type.
According to docs the userActivity is possibly used when Siri launches the app to finish the task. Since I don't need to launch the app (and indeed don't want to), I am just passing nil.
And now we can update the generated code:
class IntentHandler: INExtension {
    override func handler(for intent: INIntent) -> Any {
        return CreateReminderIntentHandler()
    }
}
Configure Info.plist files
Xcode 13 appears to do this step automatically for both Info.plist files, but I would still at least check it - just to be sure.
This last step is critical, otherwise your intent handler is not going to be called. You need to modify Info.plist in your main app and also in the Intents extension.
Let's start with the main app. I recommend opening the file as source code, and then you need to add this part:
<key>NSUserActivityTypes</key>
<array>
    <string>CreateReminderIntent</string>
</array>
In this array you would add all the intents from Intents.intentdefinition. Notice the name. "CreateReminderIntent". I initially used "CreateIntent" as this is name in the intent definition file and then also tried "CreateReminderIntentHandler". Both of these did not work.
Shortcuts app would just launch my main app when testing the shortcut.
So just to reiterate. If you have intent named "DoCoolStuff", in the Info.plist you need to put "DoCoolStuffIntent".
And now open the Info.plist in the extension. Under the key "NSExtension", you should have something like this:
<key>NSExtensionAttributes</key>
    <dict>
        <key>IntentsRestrictedWhileLocked</key>
        <array/>
        <key>IntentsRestrictedWhileProtectedDataUnavailable</key>
        <array/>
        <key>IntentsSupported</key>
        <array>
            <string>CreateReminderIntent</string>
        </array>
    </dict>
Since my intents are quite simple, I don't need to worry about phone being locked or protected data not being available. If this were the case for you, you would need to put intent name also under these keys.
Done!
If you followed all the steps, you should have working Siri Shortcut (Intent). All that is left to do is to test it via Siri or Shortcuts app.
Here is the checklist:
- Capability
- Intents.intentdefinition file
- Intents Extension
- Custom intent handler
- Modified Info.plist files
Uses: Xcode 12 & Swift 5.3

