Gradient borders in UIKit
Short post on applying gradient to borders without too much hassle.
Published: Feb. 12, 2022 Sponsored See booksWhile playing with the gradient text in UIKit using rendered UIImage, I wanted to use the gradients for other stuff, and borders are a pretty lovely candidate.
And with the approach via UIColor, there is nothing to implement. We can assign the colors to the layer.borderColor property, and that's it.
As a reminder, below is the code to render gradient into UIImage:
import UIKit

extension UIImage {
    static func gradientImage(bounds: CGRect, colors: [UIColor]) -> UIImage {
        let gradientLayer = CAGradientLayer()
        gradientLayer.frame = bounds
        gradientLayer.colors = colors.map(\.cgColor)

        // This makes it left to right, default is top to bottom
        gradientLayer.startPoint = CGPoint(x: 0.0, y: 0.5)
        gradientLayer.endPoint = CGPoint(x: 1.0, y: 0.5)

        let renderer = UIGraphicsImageRenderer(bounds: bounds)

        return renderer.image { ctx in
            gradientLayer.render(in: ctx.cgContext)
        }
    }
}
And then you create color like this:
let gradient = UIImage.gradientImage(bounds: borderView.bounds, colors: [.systemBlue, .systemRed])
let gradientColor = UIColor(patternImage: gradient)
Last step is just a matter of assignment:
borderView.layer.borderColor = gradientColor.cgColor
borderView.layer.borderWidth = 3
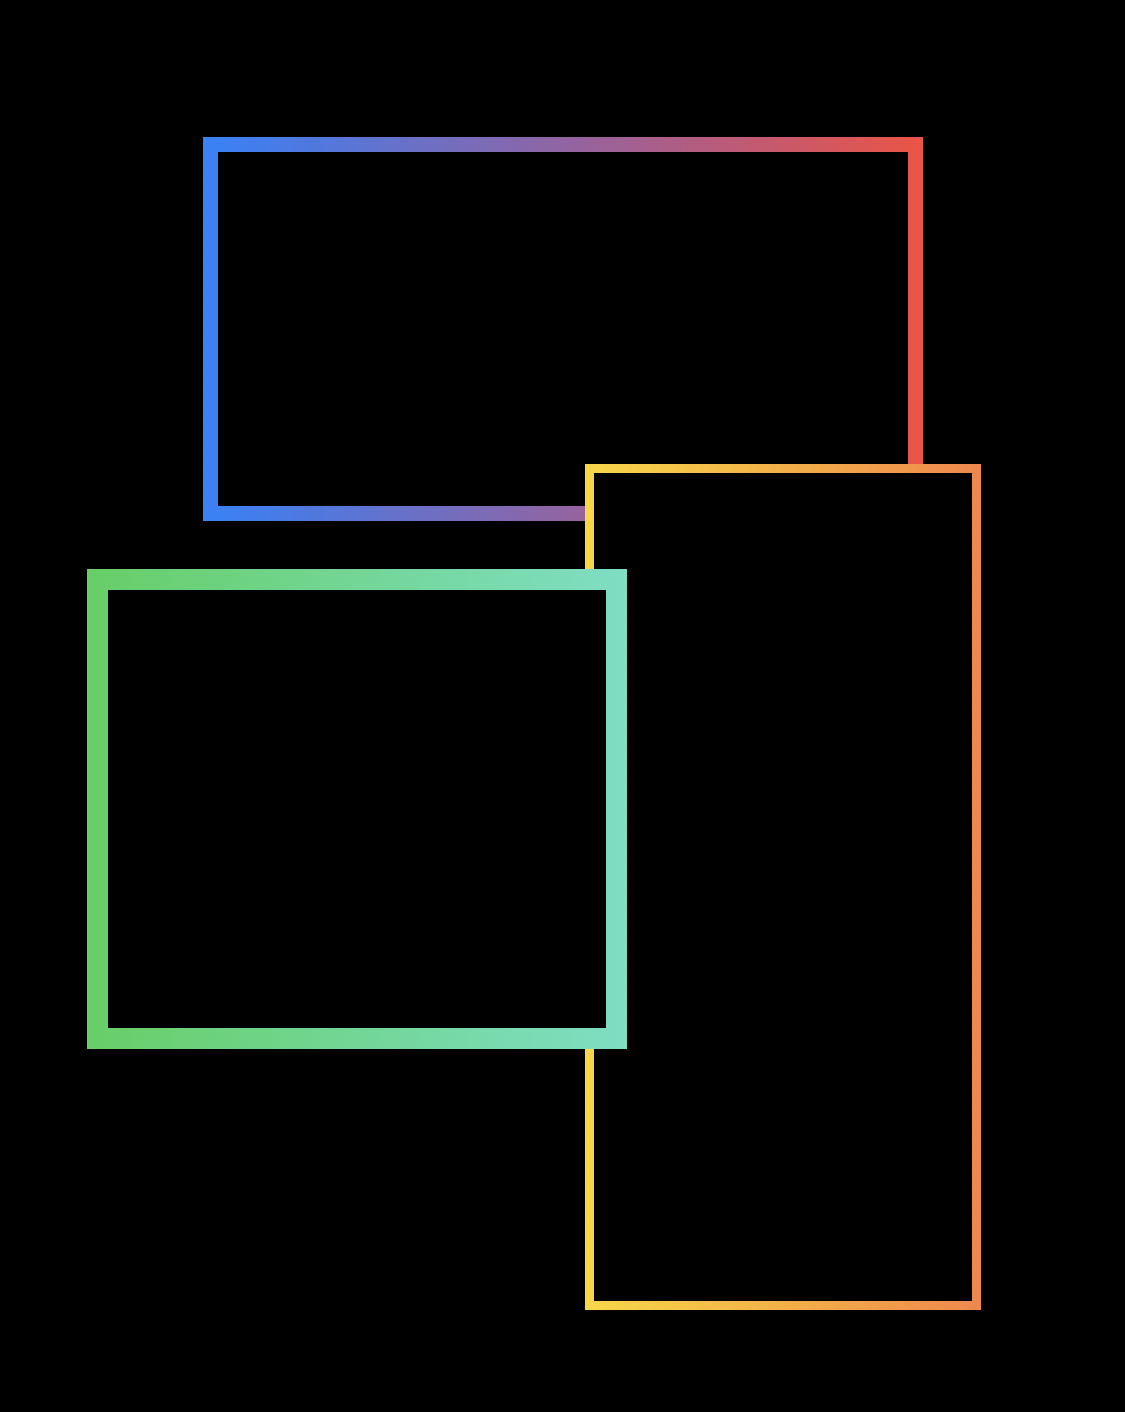
And we have a view with a gradient border.
Customizing the gradient direction
With text the most common is left to right direction created by this setting:
gradientLayer.startPoint = CGPoint(x: 0.0, y: 0.5)
gradientLayer.endPoint = CGPoint(x: 1.0, y: 0.5)
It makes sense to tweak this to achieve different effects with these borders. Once you understand how these points work, it becomes pretty straightforward.
We basically have this coordinate space that tells the gradient layer how to render itself:
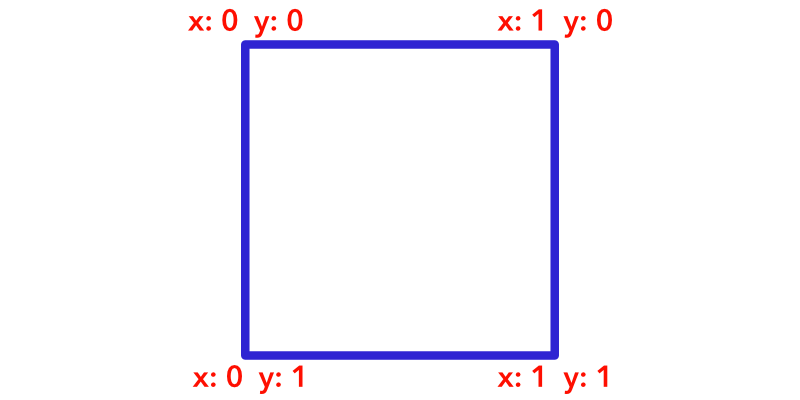
I hope my "pro" illustration helped at least a bit 😄
Or maybe a couple of examples would work better. We already saw the left to right configuration. And to create the right to left, we can flip the colors instead.
Diagonal gradient from top left to bottom right would be created using these points:
gradientLayer.startPoint = CGPoint(x: 0.0, y: 0.0)
gradientLayer.endPoint = CGPoint(x: 1.0, y: 1.0)
Conversely to create diagonal from bottom left to top right we would do:
gradientLayer.startPoint = CGPoint(x: 0.0, y: 1.0)
gradientLayer.endPoint = CGPoint(x: 1.0, y: 0.0)
GradientBorderView
Similar to the GradientLabel introduced in the previous post, we can encapsulate this configuration into UIView subclass mostly because we need to know the view's bounds for the best result.
Here is the class:
class GradientBorderView: UIView {
    var gradientColors: [UIColor] = [.systemGreen, .systemMint] {
        didSet {
            setNeedsLayout()
        }
    }

    override func layoutSubviews() {
        super.layoutSubviews()

        let gradient = UIImage.gradientImage(bounds: bounds, colors: gradientColors)
        layer.borderColor = UIColor(patternImage: gradient).cgColor
    }
}
Feel free to use it in your projects. You can also possibly override the init to provide default layer.borderWidth value, since the current default is 0 which won't show the border.
Follow on Bluesky to not miss new posts
iOS blogger and developer with interest in Python/Django.