How to create Press Kit for your mobile app
Short guide to get you started, especially if you haven't created one before.
Published: Feb. 20, 2022 SponsoredDiscover new games to play, organize your library, read reviews and more.
This post will go over how to prepare your press kit (otherwise also known as a media kit) for your iOS or Android app, so it has a better chance of getting covered by the press. Press kit is a bundle of resources for the journalist to have appropriate screenshots or videos and app descriptions.
Note before we start: This guide will use ImpressKit, which is my web project that makes creating and hosting a press kit straightforward - however you can still get a lot of value out of this even if you decide to host the press kit yourself. Just don't provide it in a ZIP file, which is a bad idea.
Another note: ImpressKit is a paid product (currenty $33/year with 1 month free trial) so if you are hobby dev who doesn't have significant income from your apps, it is probably not a right tool for you.
Create the press kit
If you don't plan to use ImpressKit, feel free to skip to next section which deals with the actual content.
After you register, your will see a prominent "Create Press Kit" button. I guess I don't have to explain what it does :-)
If you have app already on the App Store, you can use the import option which will fetch basic info like name, icon, adds App Store link to your press kit and also prepares image tags based on the platforms your app supports.
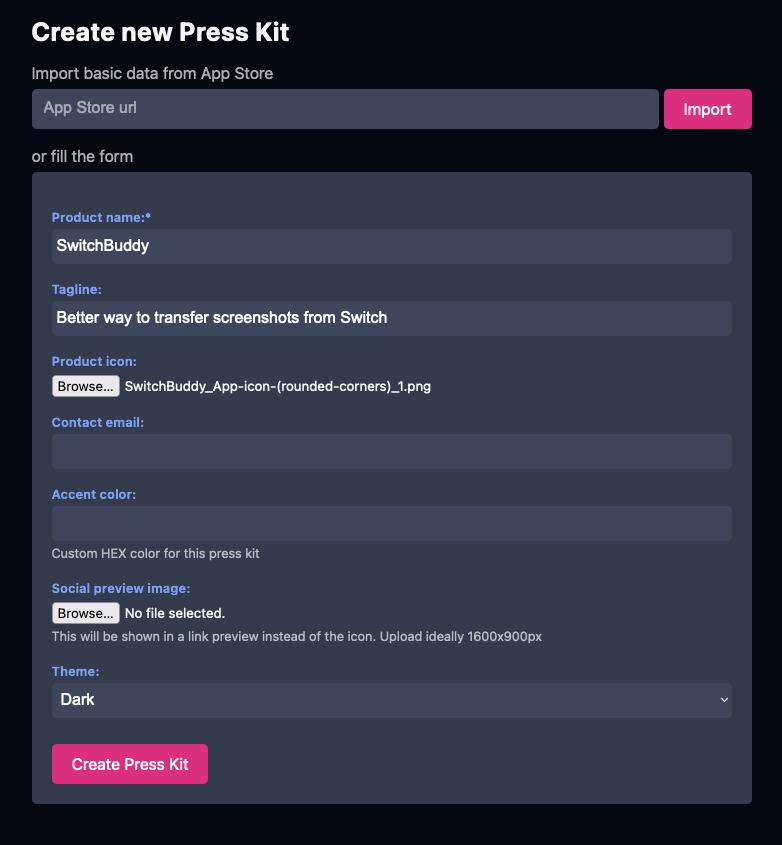
Or you can fill the details manually. I would recommend adding at least a app name with icon. Add "Accent color" (using the HEX format) and ImpressKit will use this color to better match the press kit look to your individual app.
And don't forget to switch to "Light theme" if your app is primarily on the light side of the color spectrum for best results.
App description
Let's start with the textual part of your upcoming press kit. This is very important and should quickly give the journalist all the relevant information about your app. Mainly key differential features, what the app offers, who the audience is, and explained pricing.
Writing a press kit app description can seem like a daunting task if you just started. For this reason, I created a freely available tool that will help you get started. It is a series of prompts about your app, and once you finish it, you will get Markdown-formatted text to use however you want.
So you can either copy it to your ImpressKit press kit or elsewhere. Login is not needed to use the tool, but if you are signed into ImpressKit, your final texts will be saved under your account and easily accessible later.
Going through the tool should give you a good starting text to expand and iterate. Since apps differ significantly, the tool covers only the essential parts.
For more information about the text, feel free to read the guide "How to prepare text overview" - it is freely available.
If you are new to Markdown, which ImpressKit uses, check out the "How to write Markdown" guide, which links well-done tutorials.
Image assets
After you are done with the text, it is time to prepare at least a basic set of image assets. This will ensure that journalists interested in writing about your app have pretty screenshots ready to use.
The most important asset here is plain un-edited screenshots captured on current hardware. If your app relies heavily on user-generated content, I would recommend spending some time preparing it for screenshots - so your app can look the best.
You can also provide screenshots in the device frames, but as an addition, never as the only screenshots. Journalists mostly prefer un-edited screenshots for web and print.
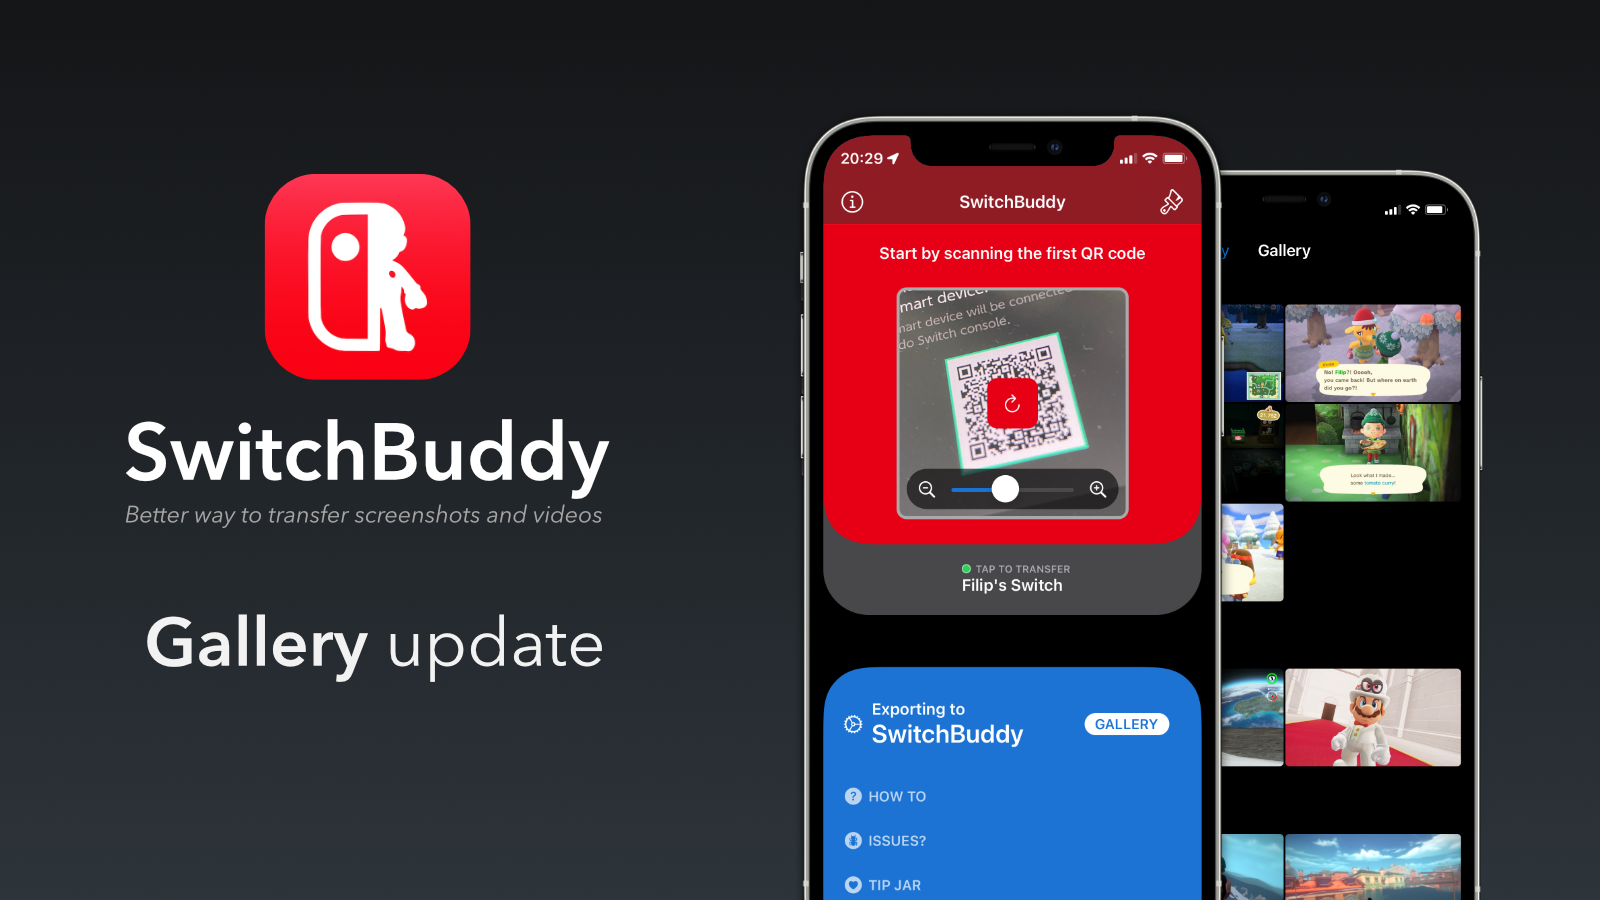
As a bonus, you can provide "banners," which are 16:9 (in most cases) images suitable for article headers or sharing on social media. These require considerably more effort; however, once you have a basic template, you can keep updating it later with up-to-date screenshots.
Below is an example of what I mean by banner:
Which brings us to another important point. Keep your screenshots reasonably recent.
As with the text description, feel free to read the guide "Images to include in a press kit," which goes into more details.
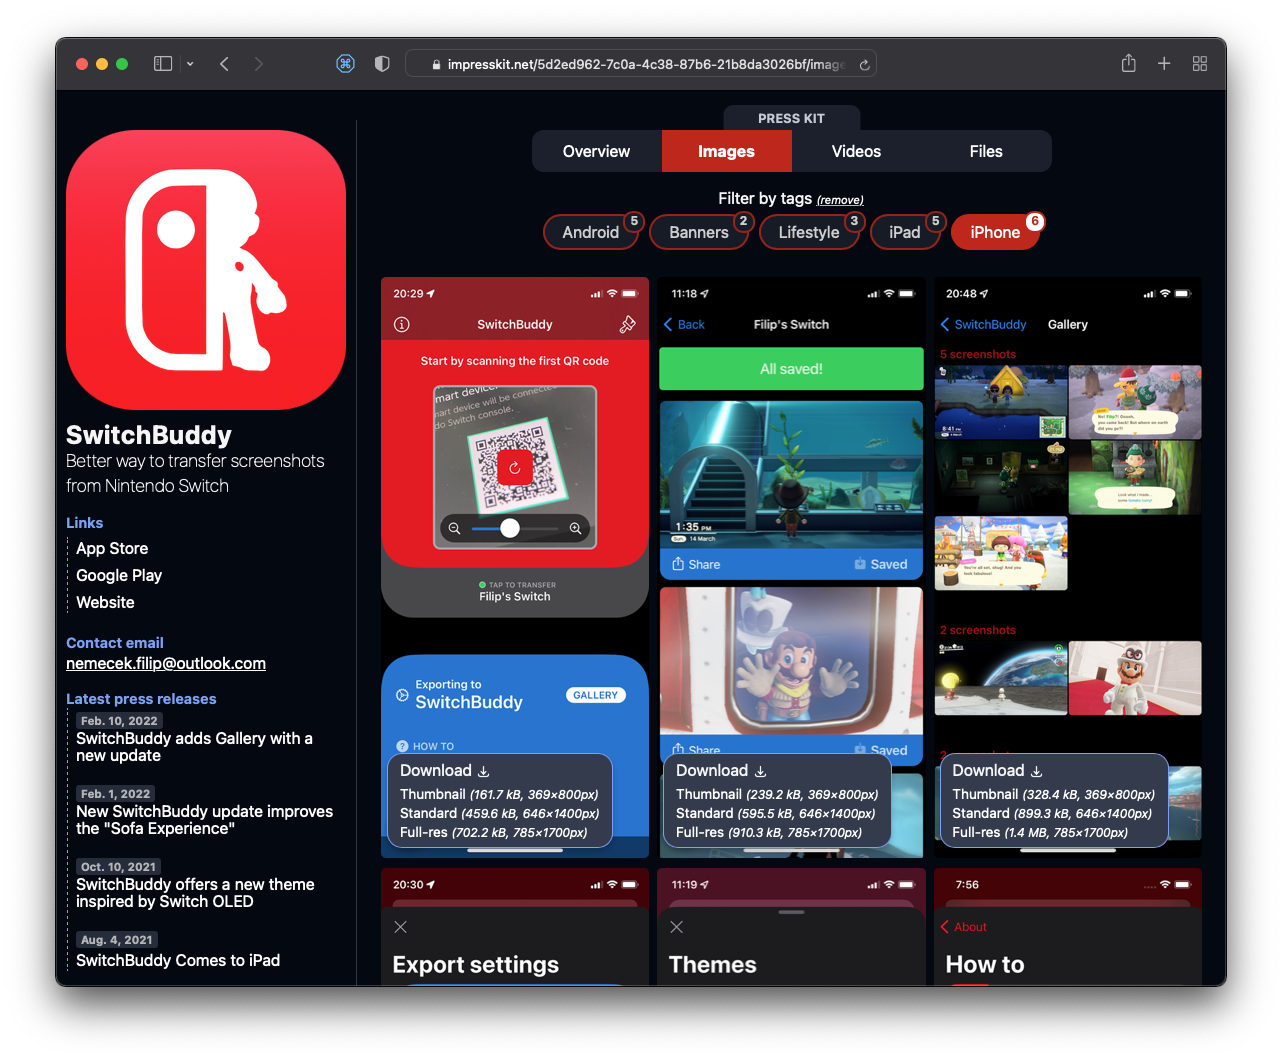
TIP: If you have more than a few image assets, don't forget to tag them in ImpressKit which will let journalists filter image assets by these tags.
The rest
App description and plain screenshots should be the absolute minimum if you decide to have a press kit. It is a good idea to provide App Store or Google Play links, an app's website (if you have one), and possibly TestFlight if you frequently let people test your app.
ImpressKit has special "Links" section in the sidebar exactly for these links. It is readily available from all the pages in your public press kits.
Videos are a special case and depend greatly on the type of app you have and your video skills (or willingness to hire help). See the guide "Videos to include in a press kit" for more details.
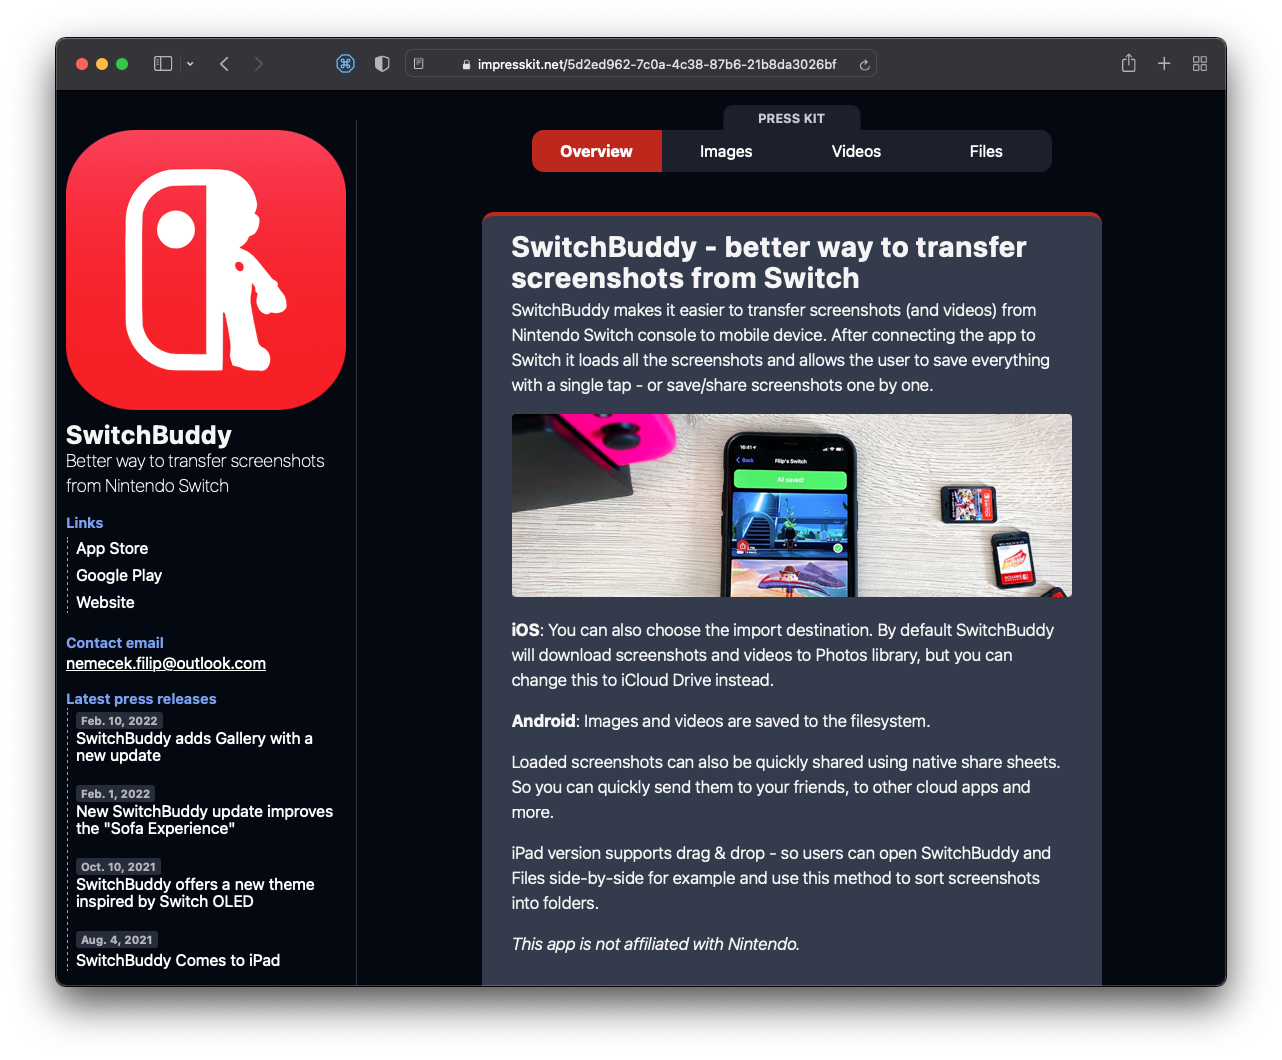
Example Press Kit
I am using ImpressKit for my own apps, for example my most popular one SwitchBuddy. You can also check out the live version.
Follow on Bluesky to not miss new posts

iOS blogger and developer with interest in Python/Django.